
Top board is a fairly normal 4x4 city board. Fairly simple and flat though I have to admit doing the streets at an angle is way more difficult than it looks. this only complicated itself with the sewer that lines up with it underneath...

The city streets are a simple build of foam core for the blocks and simple paint jobs. The sewer grates are simple green stuff sculpts that really anyone could do as well. lets get to the underside of this board though:

The sewer board in all its insane glory. This is primarily meant as an Infinity board but can work for other systems with skirmishing infantry fairly well.
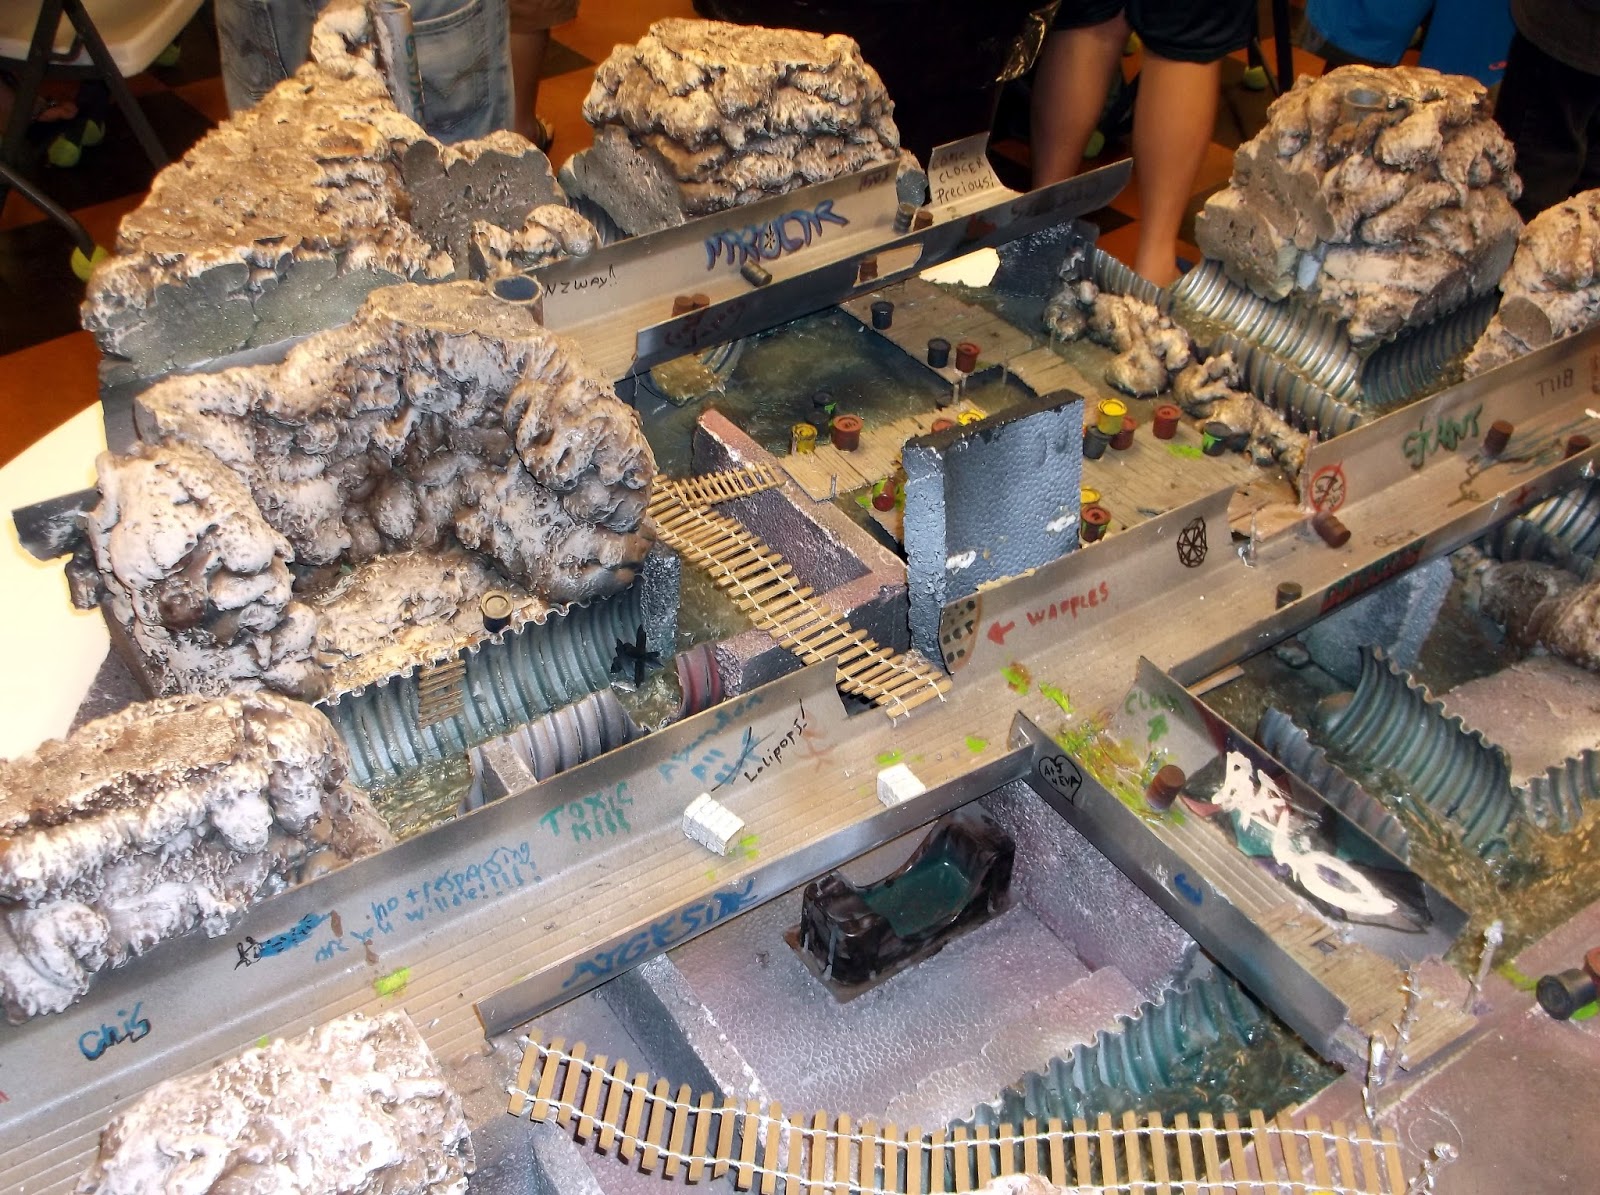
The long channels are gutters chopped to fit and the ribbed pipes beneath them are simple drainage pipes cut in half lengthwise.
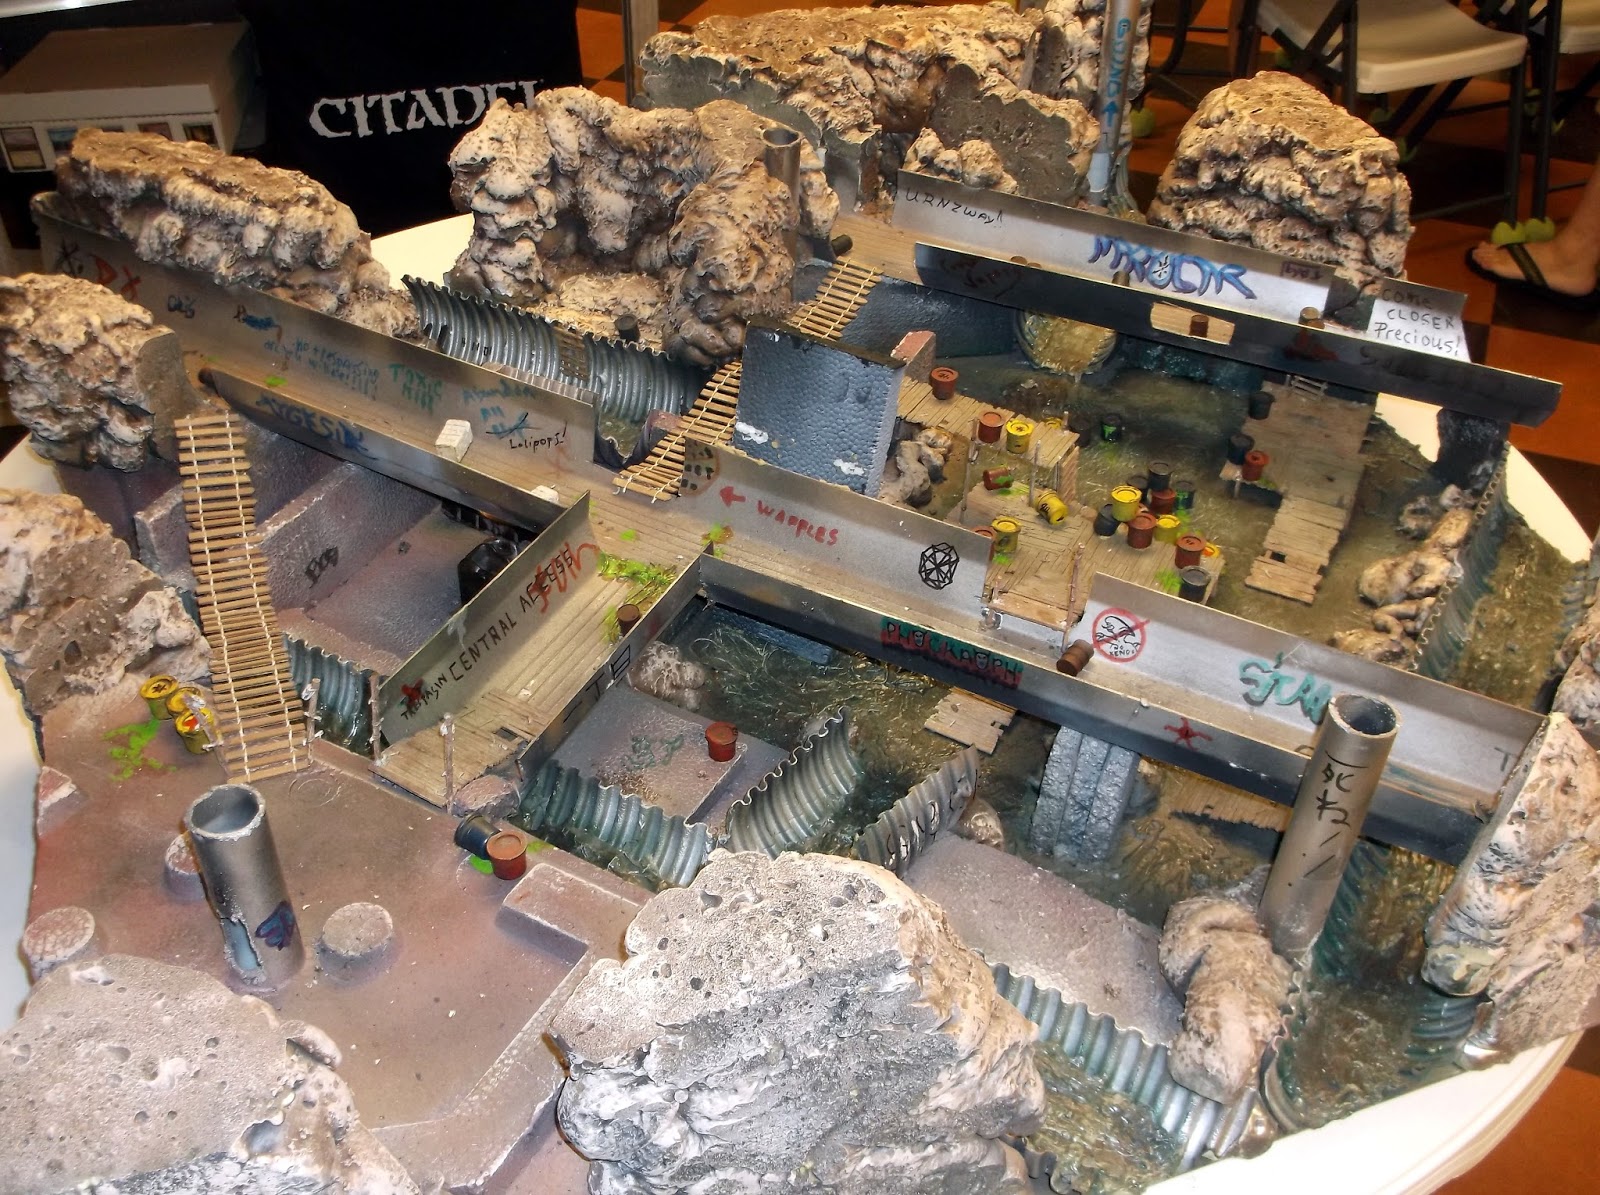
All the rocks are Great Stuff spray foam pilled on to taste and provide a tone of stability to the board. The city board that goes on top lines up with the sewer exit pipes so a large battle can be had on a small board with ease.


Behold the majestic Narwhal immortalized in graffiti! After putting the board in I just invited everyone in the store to add graffiti and did a bit of my own as well.


As fun as the Hobbit starter set terrain looked it really served no useful purpose in war gaming until this board. The barrels are all GW start paint pots that never even made it to our store before drying up. Thankfully the Walmart spray paint and Vallejo paints used to make them look more like barrels functioned fine.

Here's one of the PVC pipes used as transition points between boards. Originally they were going to be the main/only support for the top board but the foam quickly took over that role.
And now some progress shots so you can see the assembly proccess:

So planning took a lot of sitting and thinking about how to manage a stupidly large project for as little money as possible. Lots of liquid nails and cheap foam here just getting the main shapes and piping in.

The waters been put in here with a first layer of plaster and a second layer of silicone to make sure it doesn't chip or get ruined later on. War gamers are incredibly abusive people when it comes to terrain they don't own. This took many black spray cans to prime. Their sacrifice was not in vain!

Just some preliminary coloring with spray paint.

And here is the board with most the colored spray painting done. Using a spray can to put down base colors takes a little practice and experimenting but saves a tone on time as none of this is brush work at this point. Its like using a single action airbrush that only covers a large area. Unfortunately by this point I was still working in a very poorly lit garage and the water look way darker and moodier than Caribbean to my eyes until I took a picture and color corrected the flash. After this pic I went in with some browns and greens to dirty up the water as well as a greyish green wash.
This is to date the largest scratch build by far that I have or ever want to do. But at least it looks sweet to play on in store! Anyone who wants to try this board out come down to Who's Games in Rapid City South Dakota as its always out and avaailable.