
So to start off just tear off some cork from a sheet or your favorite wine stopper and shape it into a rock for your little plastic man dolls to stand on. If you want you can add bubbles or other liquid like textures at this stage.
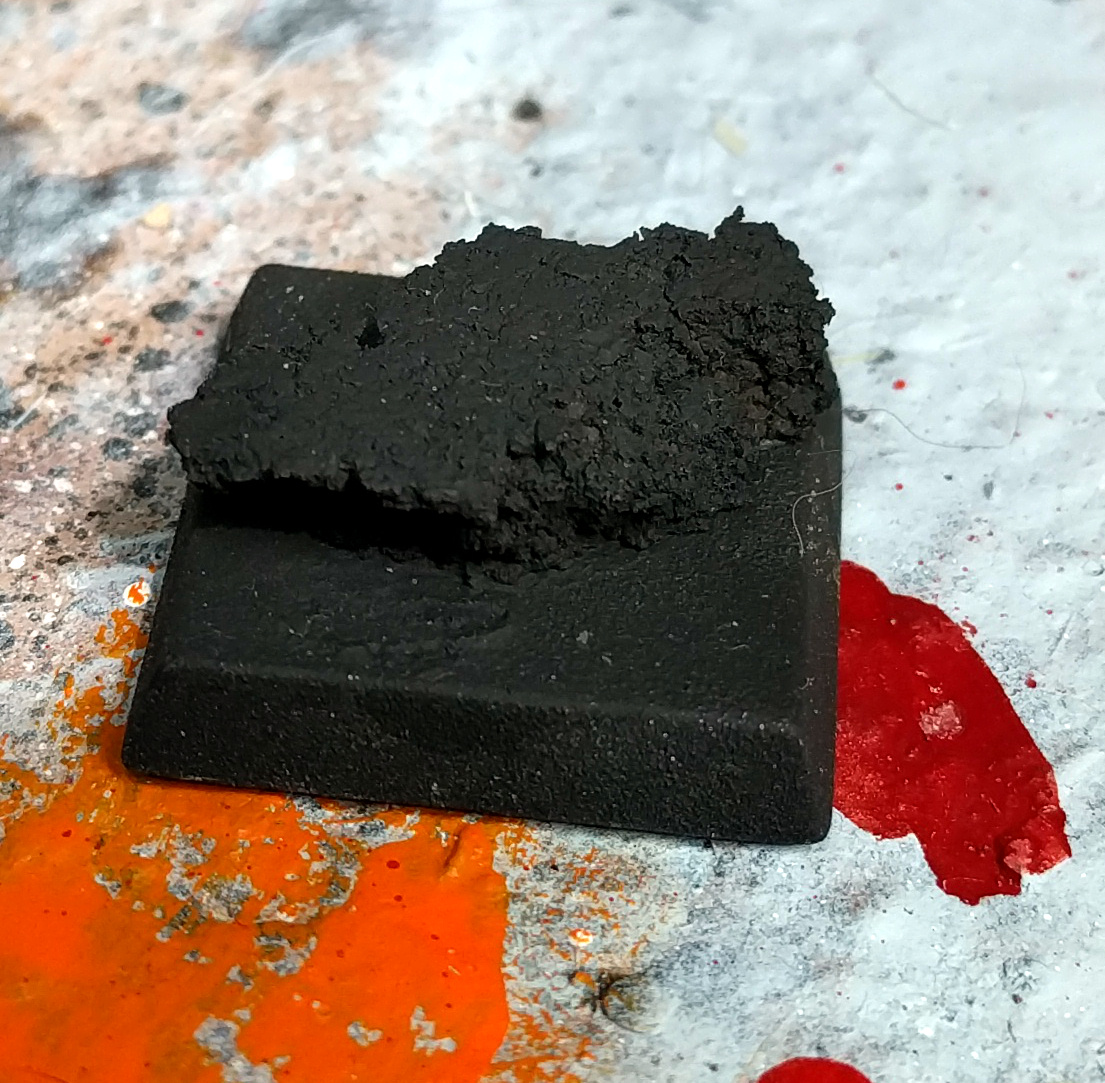
Next paint the whole thing black.

Now take a dark grey or blue-grey and drybrush it over the rock lightly. for a dark black rock like this you want to keep the underlying black color and just highlight edges and cracks so keep it light!

Alright I did miss a few photos but the next step is to paint white everywhere that you will end up having lava. This is to provide a nice bright base color to start layering your fiery lava colors.
Then build up the glowing effect of the lava by drybrushing red first along the edges and then a bright orange. Make sure to keep in mind that the light from the lava will be coming from below thus leaving the tops of the rocks in shadow.

Now cover all of that pearly whiteness with red. We will be working from the coolest point in the lava to the hottest.

Now mix that red with a little orange and put the next layer on top of the red leaving a little bit of red around the rock platform. This way the red is nearest to the rock and as we move outward we will be adding lighter colors eventually moving to orange, then yellow and finally white-yellow.

While I let that dry We can start on the movement tray itself. I've got an old GW movement tray here but any of them will do. For ease of transport I've added a bit of roofing flash to the floor of the tray so that I can magnetize miniatures to it.

And back to our base I've use a watered down layer of orange again leaving a little bit of the last darker orange layer showing as we radiate out from the rock.

This time a thinned layer of bright orange is added and the base starts to take some shape. Keeping the layers thin from here on will not only hide more brush strokes but allow the last layer to show through a little helping to blend them together without too much effort.

Back to the movement tray now. So to start with I cover the whole thing with sand and chip away small areas to create lava veins with. Then it receives the same steps as the bases as it is turned black, drybrushed grey and drybrushed red then orange to create the 'glow' of the lava.

Depending on how many models there will be on the base and how hard it will be to continue painting around the model you can leave the model off the base or put it on now. It can be a little tricky to transfer the glow of the lava to the miniature itself before you put it on the base but sometimes it will be necessary. I've chosen to affix the models to the base at this point and paint the lava veins in the tray orange.

Then the veins get a bright orange layer leaving the darker orange closer to the rocks just like the bases.

Next a stripe of yellow is added and the tray starts to come to life.

Now that our bright orange is applied we mix a little yellow in with it and thin it down before applying it as our next layer.

So since we have our model on the base now AND we already have our fire colors on the palette it's time to do the object source lighting on the model from the lava glow. Using an airbrush to do this can be loads easier but doing it by brush doesn't have to be a monumental task.
Start with red just like we did on the rock and drybrush the 'glow' onto the model wherever the light would hit it. It's a little hard to see on this one since the basic body is already red (it's more visible on the beard) but make sure that ALL of your drybrush strokes are going in the same direction that the light would be traveling in (in this case moving the brush up against the model since the 'floor' is glowing).

Just like the rocks after red comes orange and finally this time do a little bit of yellow with each color being a little lighter on the drybrushing. This will give a decent OSL effect without really having to do that much work! How much glow you want will be personal choice, for mine I didn't want the glow of the lava to overpower the models so I only do a little though again that is just personal choice. You can always add more paint to make the glow stronger but remember you can ONLY add more. Removing it will require you to re-paint the model itself...

Alright back to the base itself we now start mixing in yellow with our orange to make a creamy bright orange color and layer that on the base just like the other colors.

For our movement trays we now take a little bit of yellow and mix it with white. Use this color to make a thin stripe in the middle of each of the lava veins in order to really sell the fire effect.

Once the orange dries its time to lay down some thinned out yellow as the base starts to feel a little hot. Remember to keep radiating further away from the rock leaving your previous lairs showing as you go further in.
If your yellow is having a hard time showing through try mixing in just a small amount of white to give it some body. If you need to 'tame' the brightness out of it and bring it down to yellow just thin some yellow down and go back over the brighter yellow.

Next we will add a little white into our yellow to make a bright yellow layer.

And as our final layer take that bright yellow and mix it into some watered down white for a off white yellow color. This will be your brightest point in the lava though if you feel like you need to go brighter just keep diluting the yellow into white until you reach your desired final layer.

As a final touch I like to edge the base with black though you can always just wrap the lave paterns around the side of the base as you go instead. Again this is all personal choice.

Finally here's the full on finished regiment of Abyssal Half-breeds all with friendly bright lava bases! It is a lot of steps but they are all fairly small steps that work well when doing larger batches of bases. Combined with the unit tray this unit really comes to life.
Hope someone finds this little tutorial useful and if anyone wants a tutorial for anything else that's been up on the blog let me know I'll look into to getting a step by step made!
No comments:
Post a Comment