Tuesday, August 1, 2017

How To: Lava Bases

Going to try something new here and do some tutorials and share a little bit of experience and or knowledge.  What better place to start than happy little lava bases?  All you need is paint, bases, cork and sand!  I use Vallejo paints in this one but I won't be referencing the names of the paints (I don't even read them honestly!) and will be referring to them as simple shades of colors.  These are also the same bases I use for my Abyssal Dwarf army.


So to start off just tear off some cork from a sheet or your favorite wine stopper and shape it into a rock for your little plastic man dolls to stand on.  If you want you can add bubbles or other liquid like textures at this stage.
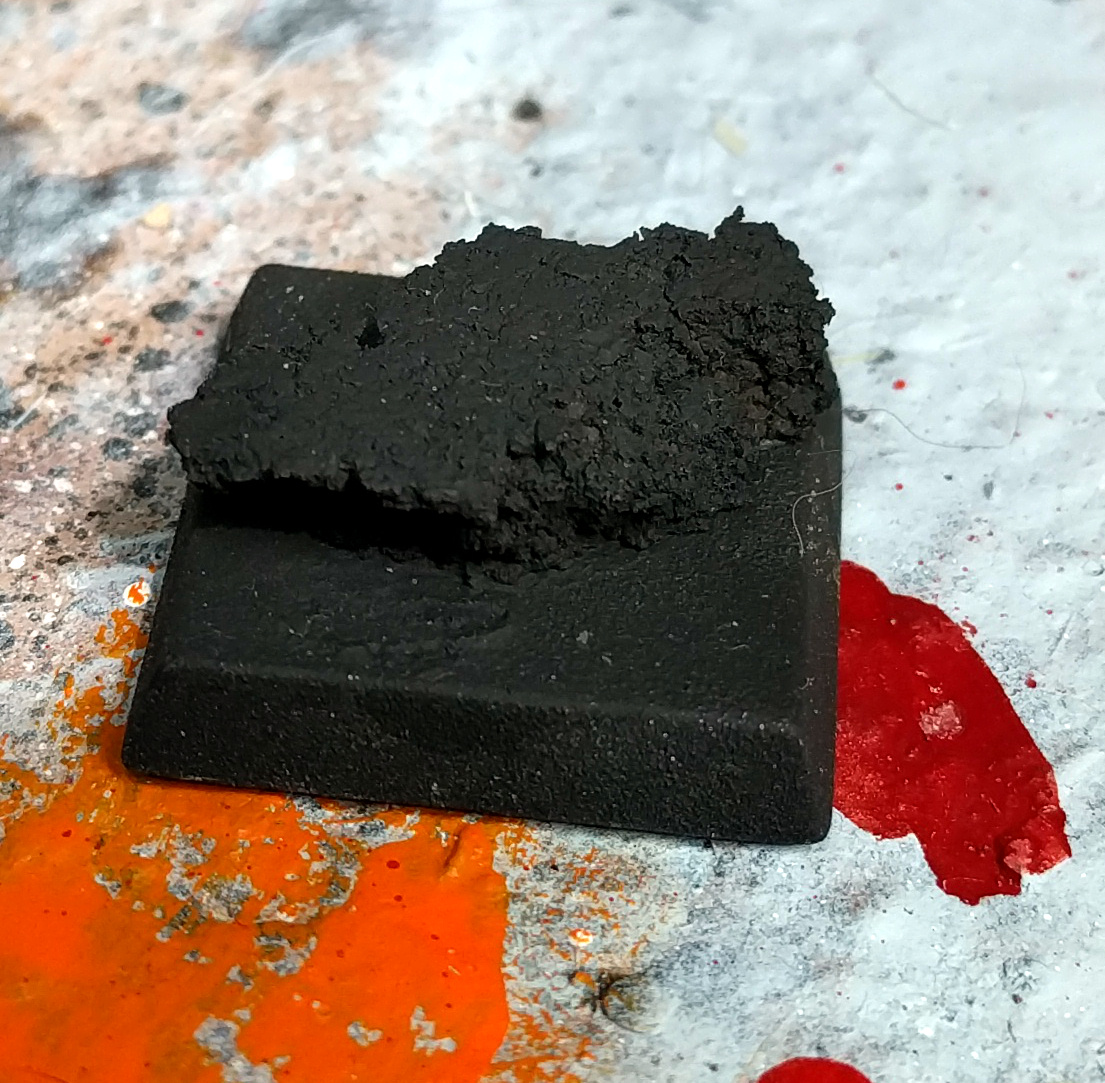

Next paint the whole thing black.


Now take a dark grey or blue-grey and drybrush it over the rock lightly.  for a dark black rock like this you want to keep the underlying black color and just highlight edges and cracks so keep it light!


Alright I did miss a few photos but the next step is to paint white everywhere that you will end up having lava.  This is to provide a nice bright base color to start layering your fiery lava colors.

Then build up the glowing effect of the lava by drybrushing red first along the edges and then a bright orange.  Make sure to keep in mind that the light from the lava will be coming from below thus leaving the tops of the rocks in shadow.


Now cover all of that pearly whiteness with red.  We will be working from the coolest point in the lava to the hottest.


Now mix that red with a little orange and put the next layer on top of the red leaving a little bit of red around the rock platform.  This way the red is nearest to the rock and as we move outward we will be adding lighter colors eventually moving to orange, then yellow and finally white-yellow.


While I let that dry We can start on the movement tray itself. I've got an old GW movement tray here but any of them will do.  For ease of transport I've added a bit of roofing flash to the floor of the tray so that I can magnetize miniatures to it.


And back to our base I've use a watered down layer of orange again leaving a little bit of the last darker orange layer showing as we radiate out from the rock.


This time a thinned layer of bright orange is added and the base starts to take some shape.  Keeping the layers thin from here on will not only hide more brush strokes but allow the last layer to show through a little helping to blend them together without too much effort.


Back to the movement tray now.  So to start with I cover the whole thing with sand and chip away small areas to create lava veins with.  Then it receives the same steps as the bases as it is turned black, drybrushed grey and drybrushed red then orange to create the 'glow' of the lava.


Depending on how many models there will be on the base and how hard it will be to continue painting around the model you can leave the model off the base or put it on now.  It can be a little tricky to transfer the glow of the lava to the miniature itself before you put it on the base but sometimes it will be necessary. I've chosen to affix the models to the base at this point and paint the lava veins in the tray orange.


Then the veins get a bright orange layer leaving the darker orange closer to the rocks just like the bases.


Next a stripe of yellow is added and the tray starts to come to life.


Now that our bright orange is applied we mix a little yellow in with it and thin it down before applying it as our next layer.


So since we have our model on the base now AND we already have our fire colors on the palette it's time to do the object source lighting on the model from the lava glow. Using an airbrush to do this can be loads easier but doing it by brush doesn't have to be a monumental task.

Start with red just like we did on the rock and drybrush the 'glow' onto the model wherever the light would hit it.  It's a little hard to see on this one since the basic body is already red (it's more visible on the beard) but make sure that ALL of your drybrush strokes are going in the same direction that the light would be traveling in (in this case moving the brush up against the model since the 'floor' is glowing).


Just like the rocks after red comes orange and finally this time do a little bit of yellow with each color being a little lighter on the drybrushing.  This will give a decent OSL effect without really having to do that much work!  How much glow you want will be personal choice, for mine I didn't want the glow of the lava to overpower the models so I only do a little though again that is just personal choice.  You can always add more paint to make the glow stronger but remember you can ONLY add more.  Removing it will require you to re-paint the model itself...


Alright back to the base itself we now start mixing in yellow with our orange to make a creamy bright orange color and layer that on the base just like the other colors.


For our movement trays we now take a little bit of yellow and mix it with white.  Use this color to make a thin stripe in the middle of each of the lava veins in order to really sell the fire effect.


Once the orange dries its time to lay down some thinned out yellow as the base starts to feel a little hot.  Remember to keep radiating further away from the rock leaving your previous lairs showing as you go further in.

If your yellow is having a hard time showing through try mixing in just a small amount of white to give it some body.  If you need to 'tame' the brightness out of it and bring it down to yellow just thin some yellow down and go back over the brighter yellow.


Next we will add a little white into our yellow to make a bright yellow layer.


And as our final layer take that bright yellow and mix it into some watered down white for a off white yellow color.  This will be your brightest point in the lava though if you feel like you need to go brighter just keep diluting the yellow into white until you reach your desired final layer.


As a final touch I like to edge the base with black though you can always just wrap the lave paterns around the side of the base as you go instead.  Again this is all personal choice.


Finally here's the full on finished regiment of Abyssal Half-breeds all with friendly bright lava bases! It is a lot of steps but they are all fairly small steps that work well when doing larger batches of bases.  Combined with the unit tray this unit really comes to life.

Hope someone finds this little tutorial useful and if anyone wants a tutorial for anything else that's been up on the blog let me know I'll look into to getting a step by step made!

Sunday, July 30, 2017

Good Dwarves and some Infinity!

Though no project ever seems to remain 'complete' I have added completed projects to the side bar.  Hopefully as I get pictures updated and in presentable quality I can keep a log of armies that are 'completed'.  In general this just means I haven't added anything more to them for a while.

With that I now have a 1000 point demo army of dwarves!


When I realized a troop of rangers could bump this up to a respectable 1000 points I figured it was time to revisit the old diamond mine dwarves!  I'd like to go back and make a more interesting banner some day when I can find the inspiration and ideas for it.

And here's the whole (smallish) army.  You can check up some close ups of the units on the right sidebar under 'completed projects'

And since this is a random paint-o-matic here are a few more Ariadna Infinity models.  The guy I painted them for needed to quickly expand his force for a few missions so these were done in roughly a night.

Wednesday, July 19, 2017

Rats!

Due to warhammer quest insanity I had acquired most of a skaven army over time.  Of course this means I needed to now turn it into a Ratkin army for Kings of War!  A lot of these were already mostly if not fully painted.  They just recquired a base theme of which I'm going full on sewer, non multi basing. 


Clawshots will need some bigger bases when I go to make a second troop as these little buggers are at least $50 for just 3 models now.  Putting a few on 50mm will keep a nice minimum model count and still look good.


One of the many weapon teams I've accumulated throughout the hobby.


The first horde of warriors.  I have something much tackier in mind for the tunnel slaves...


The old warlock and another hero now with spiffy bases after all these years.


The Vermin Lord is being re-conscripted as a demon spawn.


First set of brutes ready to go!


And since I rarely seem to put up works in progress here's a piece of artillery converted from the old weapons and warriors catapults.  The best part is that is still works mechanically and can launch dice and other refuse at your opponent during games!


Tuesday, July 11, 2017

Big Pointy Eared Update

There are enough elves now to constitute an actual army!  Some of these are painting edits from the old Elf fantasy demo army but they look much more interesting now that they are pink!


Since it didn't take too long to repaint I could use this guy as a drakon rider lord though I haven't really had a desire to try that unit out yet.


 So far this has been my favorite model for GWs high elf line.  Its overstated just enough to avoid being bloated with useless details like I feel the new models are.  And the pose is suitably haughty for an elf as well.


The mage is of course a repaint of the demo set but the prince/king on foot finally has a base to go with his expensive armor.


The silverbreeze are again a re paint of the demo set so they came together quickly.


I tried a little different recipe for the white on the master hunter and rather like the result.  I wasn't going to bother trying this hero out until someone used one against me and it single handedly took out a troop and a regiment over the coarse of a game while hiding a forest...


The palace guard are waving a punch of pointy big knives around so hopefully they don't hurt themselves too much...


To distinguish the seaguard from what the regular tallspears will be I let them keep their sea motif while adding in some more glorious pink as well.


The archers are now a more filled out unit so the base is no longer sparse!  I really do like the slightly older GW models more than the current one.  If they remade these they would all have at least 15 extra random things strapped to them and another 10 gemstones per model.  So instead of looking like rank and file troops they would all look like some high ranking general.  I like my troops to look like troops thank you very much!

So that's one big project well on its way to being done.  Now what's next?

Monday, July 3, 2017

Purple Hippos and WWII

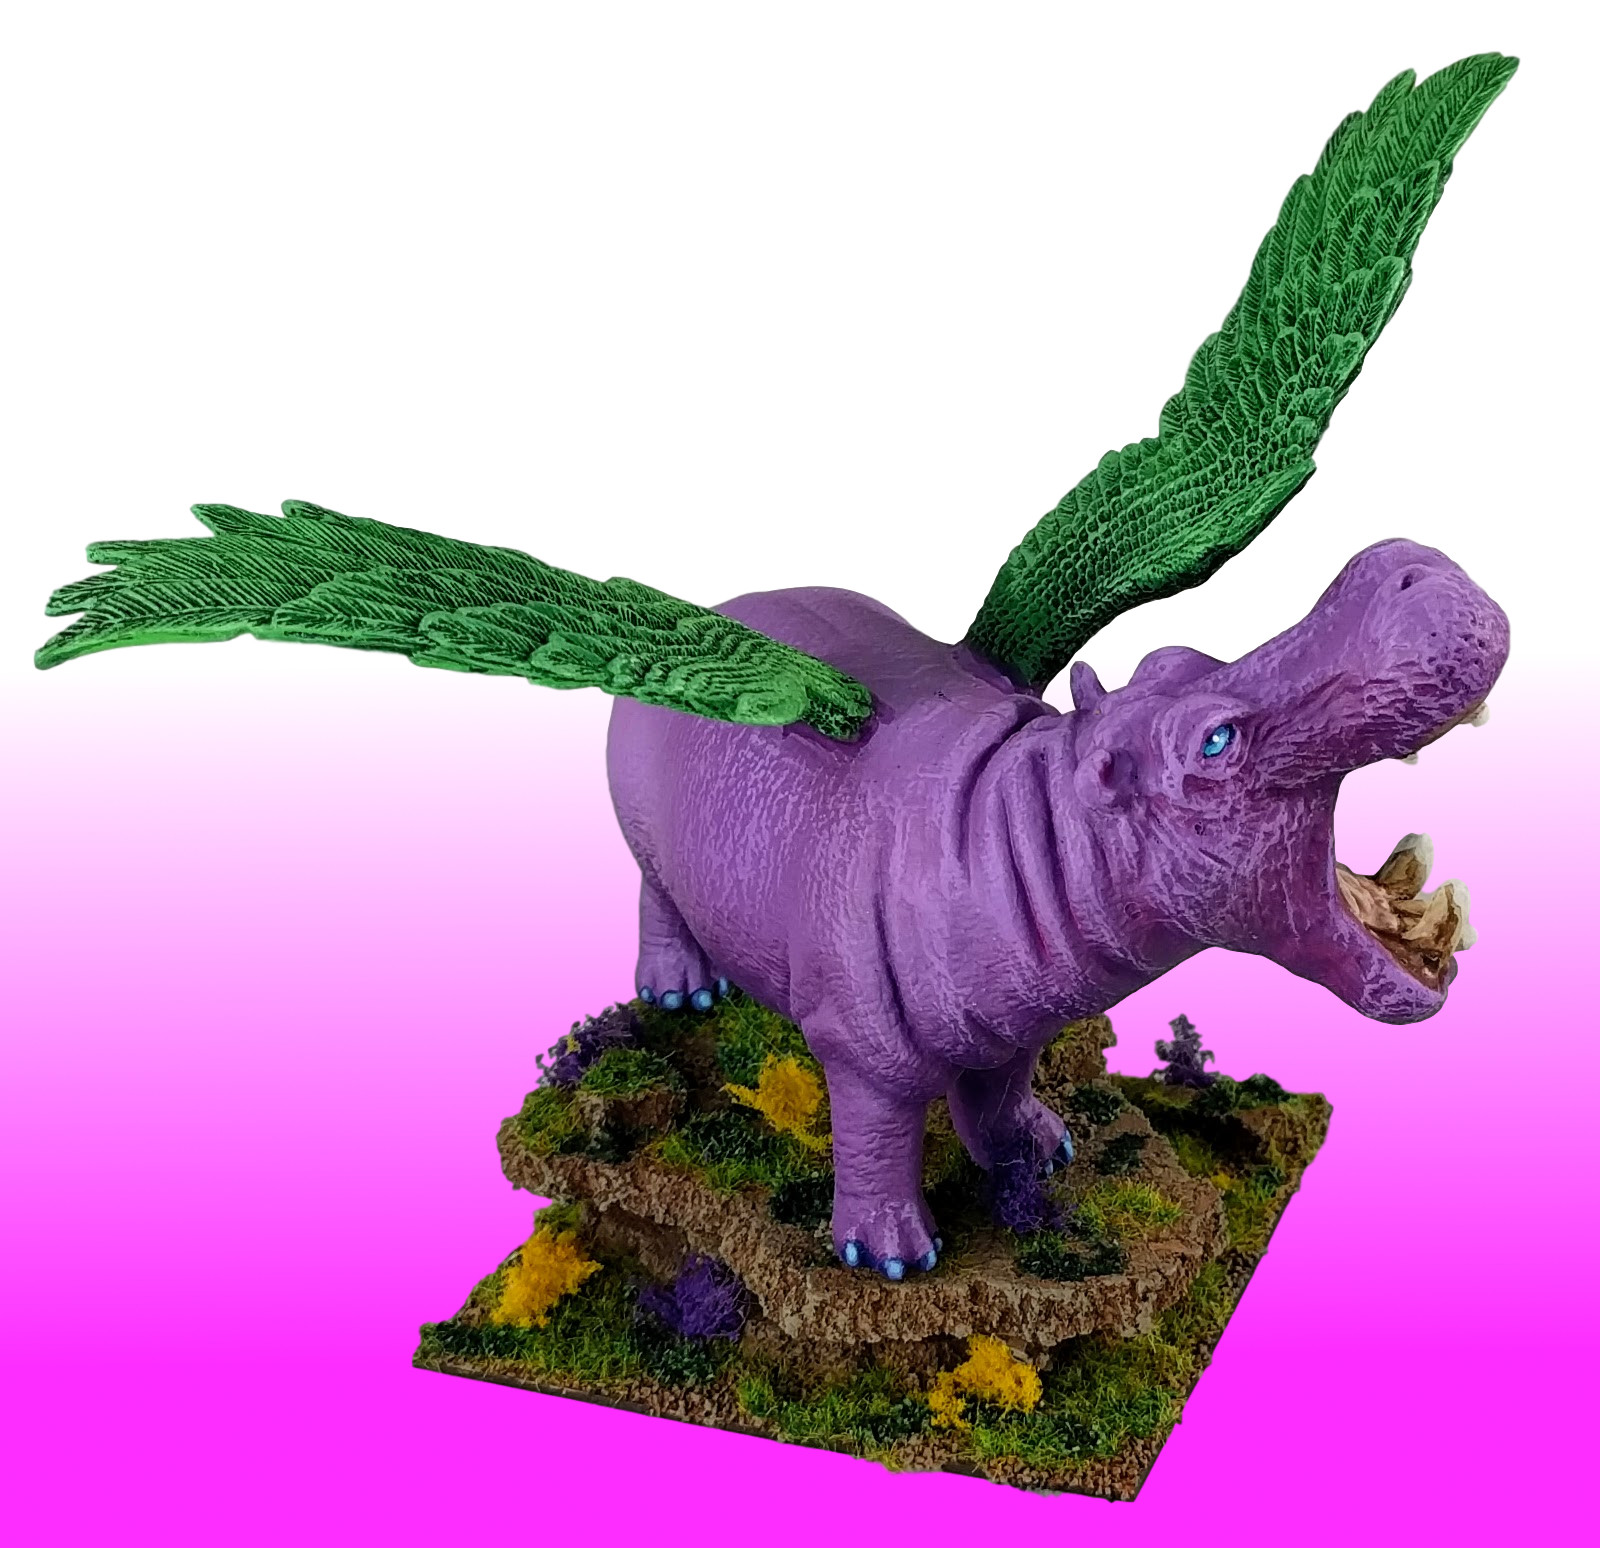
There's a not so subtle reason why the elves are sporting that strange hippo on their banners....


Behold the mighty phelddagrif magical god of group hugs!


This big guy is on a 75mm base and will represent the Dragon Kindred Lord for the Elf army.

Up next some proof that this isn't just a Kings of War blog. I painted all of these up for the store and sadly the Flames of War scene died off as the small group decided to play at home.  Eventually half of their group moved away and they ended up growing bored of each other and quit the game from what I understand.  Pro tip:  If you want to have players PLAY IN YOUR FLGS.  Games die because people try to keep others out of their group...


 First up and last in order of being painted:  Team yankee demos.  Battlefront was kind enough to send us a demo set which was made so quickly the T-72s are actually resin making it pretty much impossible to keep the smoke launchers in tact.  It was free though so that was super appreciated!


Next to the old Sherman tanks the Abrams were super intimidating size wise.


Next we have the Open Fire starter set.  I took a little extra time with these and it ended up being a really awesome looking demo for sure.

 FoW Infantry makes me want to quit painting though.  They are super detailed and if you want to get even half of it you will be painting for a long time.  Worse yet you need a ton of them...

 Need a group shot of those Germans obviously.
 The Americans thankfully had far fewer infantry though they still had a ton of detail. The Tanks thankfully had a far more simple camo scheme so they painted up super fast.

And a group shot as well.  Sad to see a game die out locally but even more sad to see a demo shelved forever.

Saturday, July 1, 2017

Bolstering the Ranks

So now that there's a new edition of 40k out I like Kings of War even more.  Seriously though what does GW have against grey knights?  I just want to play with my man dolls without asking my opponent if I can take twice as many points to even the odds!

Ahem...

So my Night Stalkers needed a few reinforcements:


I've been wanting to try out some shadow hounds as they seem like a nice fast cavalry and chaff unit that my army desperately needs.  These little guys come out of the new WizKids unpainted D&D minis.  The quality on those is really high though I do wish they hadn't primed them.  Let the customer choose their own priming color you fools!


A few specters have also been added to bolster the ranged portion of the army as well.  These guys are all mind flayers from the wiz kids line and reaper minis.


Finally I needed to add some Gore Riders to my abyssal dwarves as I just picked up a troop for the campaign.  Yet again I really don't see why people keep hating on mantics minis they have some fabulous sculpts and they paint up really well.  I only wish they had less armor to represent their slave status!


Since I was already painting up a troop might as well finish it up with a full regiment as well.  Another fun thing about the slave orc gore rider regiment box is that you can make both a troop and regiment from one box!  Sweet deal.  Love the little dwarf chariot too.