Showing posts with label abyssal dwarf. Show all posts

Wednesday, October 18, 2017

The Finish Line!

And with two new units the Abyssal Dwarves are done!


 I had to finish out one more regiment of Immortal Guard which were rather boring but it's nice to have two of them now!


Finally in order to end on a high note I did the Berzerkers.  They are doused in blood and standing over their fallen enemies.


and on top of that they have sweet tats and apparently drink lava!


If you want to check out the whole army at once head on over to the complete projects!

Monday, October 2, 2017

Nearing the Finish Line

It's been over two years (obviously off and on) since I started the old chaos dwarf army for the King of the Mountain GT.  Those were my very last warhammer fantasy games (which was an awesome send off) before switching to Kings of War which I happily did.  Those little guys took home not only best chaos dwarf (sure there were only two of us!) but best painted as well and have been near and dear to me ever since.

Now though they are nearing a completed and nearly 5000 point Abyssal dwarf army.  Plenty of mixed models as well as some home brew conversions have made this an insane but fun project.  Anywho here are a few more units to add to the legion:


Had to do another troop of gargoyles since they really are just amazing chaff units.  My only real complaint for these models has been that they tend to be confusing as a tall model that just happens to be height 1.  Of course when they look sweet on the table who cares if it confuses both yourself and the opponent right?


These little beutes came from a friend.  Neither he or I have a clue as to where these guys came from.  Some kind of world war I/II crossover dwarves.  They were super sinister and as much as I would like to use the mantic ones I couldn't resist using these as my dragon fire teams.


Another troop of Half Breeds are finished which means I can do two full regiments of the beasts.


Finally the last horde of Black Souls.  Despite some of them having shields I tend to use them as the two handed weapons version since they have big weapons and HUGE hats!  This was deffinately one of the hardest set of models to get ahold of and since the prices just keep rising on the old big hats I put in a unit filler made of the old metal Deff Dread with a happily maniacal dwarf driving it.

Only another regiment of Immortals and a regiment of berserkers to go now before I stick a fork in it...

Thursday, August 17, 2017

Yet More Dwarves

This is now the project that never ends: The Abyssal Dwarf Army....

But progress has been made, slowly.


Since I had an odd man(thing) out I decided to do a small conversion to make an Abyssal Halfbreed Champion out of the Mantic halfbreeds.   The flag is just plasticard bent under a heat gun and the hashut symbol on top was a butchered khorne symbol (surprised GW never resolved that thread when they blew up the world).


I hope all abyssal dwarf/chaos dwarf players are thanking Russian Alternative because they have done a fantastic job providing amazing looking evil dwarves at a more than fair price!  They of course make up my  blacksouls.


I decided I needed an ode to a 'friends' army in this horde so I made a prisoner that's being dragged rather unwillingly into battle.  He's done up in his armies colors and looks rather pathetic next to these strapping and battle worthy dwarves.  


Finally I finished up a new troop of half breeds.  The painted portion of the army finally outnumbers the unpainted part!

Saturday, August 5, 2017

How To: Curled Beards


Someone had requested this little tutorial on my abyssal dwarf beards so here it is.  Sadly the tutorial I used to learn this has since been lost to that great 404 in the sky or this would just be a link...


To start out make sure you have the following supplies:

Blue Yellow epoxy (aka Green Stuff), Water spray bottle, Hobby Knife (preferably a little dull but not too dull), Scultping tool for pushing the green stuff around into place, and finally a dentists pick.   I won't be detailing where to use the water but overall keep your tools and your greenstuff wet in order to stave off the sticky mess it can become.

Oh yeah and you probably want a miniature of some kind to put a suitably awesome beard on.  I have picked out one of the few abyssal dwarves left without a majestic curled beard.  Mantics beards are not bad at all but I want that old school chaos dwarf beard with the funny hats and all!  Sadly this will cover up most of the frontal details so be aware of that before you start. 


Speaking of which we start by saying an apology to all dwarven gods of all creeds and mythos. Why?  Because we will be chopping of a dwarf beard: a true sacrilegious act.    You don't have to be super clean about it because we will be sculpting over the whole beard area.


Next mix up a little bit of green stuff into a vaguely beard like shape.


Stick that weird chin tumor on right under the chopped beard area.


Take your sculpting tool and manipulate that blob so that it melds with the face parts a little.  It won't have to be super smooth all around.  Heck I even still had paint on my fingers so little bits flaked off all over!

 Seriously though don't paint and sculpt. It's your dwarves that pay the price.  Won't somebody think of the dwarves?


After the chin tumor is in place it's time to begin the beardening.  Take your dental pick and use the side of it to make indendations in the green stuff creating little lines going from the top of the beard to the bottom.  Make sure to do the same to the bottom of the beard underneath your lines to separate the strands later on as the beard takes shape.


Put on your chainmail gloves next (or just be careful) and take up your mighty hobby knife.  You will start on one side of each beard strand and just press little slits into the beard as you see above.


Next do the same to the other side of each strand.

Pause to curse and apply bandages should mistakes happen to your hand.


Then do the same to the middle of each strand.


Finally (because no one will ever notice but it will put your mind at ease and please the dwarf gods)  take the pokey end of your dental pick and make holes in the bottom of each strand of the beard to finish it out!

You now have a fully bearded dwarf and may have even made amends for the chopping off of a dwarf beard.  Should the sky's begin to turn red be sure to paint up the miniature as soon as soon as the green stuff dries fully (wait 24 hours) in order to appease the dwarf gods fully.

Hope this was helpful to all you stunties out there!  If there's something you see on the blog and want to know how its done feel free to let me know!

Tuesday, August 1, 2017

How To: Lava Bases

Going to try something new here and do some tutorials and share a little bit of experience and or knowledge.  What better place to start than happy little lava bases?  All you need is paint, bases, cork and sand!  I use Vallejo paints in this one but I won't be referencing the names of the paints (I don't even read them honestly!) and will be referring to them as simple shades of colors.  These are also the same bases I use for my Abyssal Dwarf army.


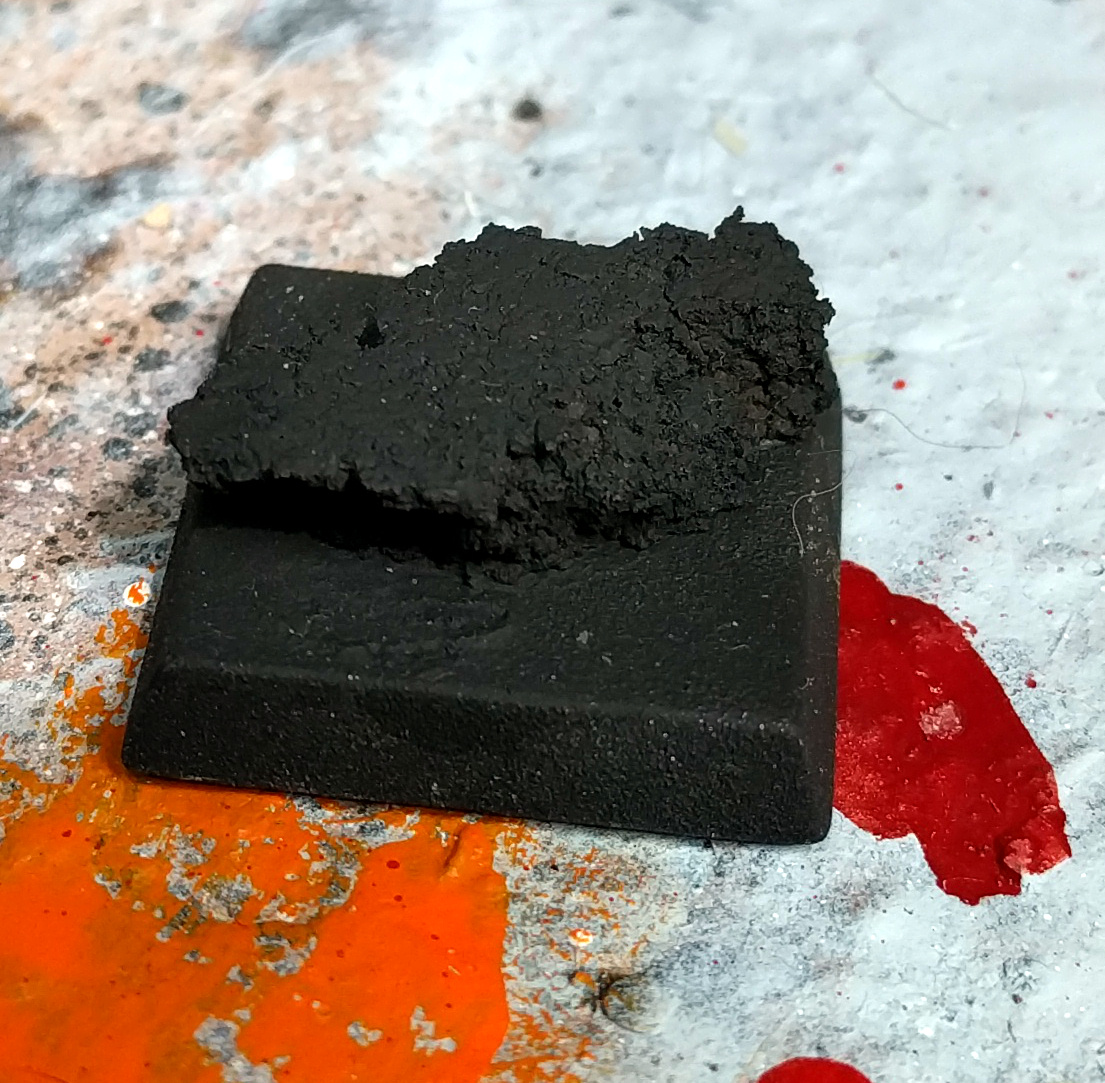
So to start off just tear off some cork from a sheet or your favorite wine stopper and shape it into a rock for your little plastic man dolls to stand on.  If you want you can add bubbles or other liquid like textures at this stage.


Next paint the whole thing black.


Now take a dark grey or blue-grey and drybrush it over the rock lightly.  for a dark black rock like this you want to keep the underlying black color and just highlight edges and cracks so keep it light!


Alright I did miss a few photos but the next step is to paint white everywhere that you will end up having lava.  This is to provide a nice bright base color to start layering your fiery lava colors.

Then build up the glowing effect of the lava by drybrushing red first along the edges and then a bright orange.  Make sure to keep in mind that the light from the lava will be coming from below thus leaving the tops of the rocks in shadow.


Now cover all of that pearly whiteness with red.  We will be working from the coolest point in the lava to the hottest.


Now mix that red with a little orange and put the next layer on top of the red leaving a little bit of red around the rock platform.  This way the red is nearest to the rock and as we move outward we will be adding lighter colors eventually moving to orange, then yellow and finally white-yellow.


While I let that dry We can start on the movement tray itself. I've got an old GW movement tray here but any of them will do.  For ease of transport I've added a bit of roofing flash to the floor of the tray so that I can magnetize miniatures to it.


And back to our base I've use a watered down layer of orange again leaving a little bit of the last darker orange layer showing as we radiate out from the rock.


This time a thinned layer of bright orange is added and the base starts to take some shape.  Keeping the layers thin from here on will not only hide more brush strokes but allow the last layer to show through a little helping to blend them together without too much effort.


Back to the movement tray now.  So to start with I cover the whole thing with sand and chip away small areas to create lava veins with.  Then it receives the same steps as the bases as it is turned black, drybrushed grey and drybrushed red then orange to create the 'glow' of the lava.


Depending on how many models there will be on the base and how hard it will be to continue painting around the model you can leave the model off the base or put it on now.  It can be a little tricky to transfer the glow of the lava to the miniature itself before you put it on the base but sometimes it will be necessary. I've chosen to affix the models to the base at this point and paint the lava veins in the tray orange.


Then the veins get a bright orange layer leaving the darker orange closer to the rocks just like the bases.


Next a stripe of yellow is added and the tray starts to come to life.


Now that our bright orange is applied we mix a little yellow in with it and thin it down before applying it as our next layer.


So since we have our model on the base now AND we already have our fire colors on the palette it's time to do the object source lighting on the model from the lava glow. Using an airbrush to do this can be loads easier but doing it by brush doesn't have to be a monumental task.

Start with red just like we did on the rock and drybrush the 'glow' onto the model wherever the light would hit it.  It's a little hard to see on this one since the basic body is already red (it's more visible on the beard) but make sure that ALL of your drybrush strokes are going in the same direction that the light would be traveling in (in this case moving the brush up against the model since the 'floor' is glowing).


Just like the rocks after red comes orange and finally this time do a little bit of yellow with each color being a little lighter on the drybrushing.  This will give a decent OSL effect without really having to do that much work!  How much glow you want will be personal choice, for mine I didn't want the glow of the lava to overpower the models so I only do a little though again that is just personal choice.  You can always add more paint to make the glow stronger but remember you can ONLY add more.  Removing it will require you to re-paint the model itself...


Alright back to the base itself we now start mixing in yellow with our orange to make a creamy bright orange color and layer that on the base just like the other colors.


For our movement trays we now take a little bit of yellow and mix it with white.  Use this color to make a thin stripe in the middle of each of the lava veins in order to really sell the fire effect.


Once the orange dries its time to lay down some thinned out yellow as the base starts to feel a little hot.  Remember to keep radiating further away from the rock leaving your previous lairs showing as you go further in.

If your yellow is having a hard time showing through try mixing in just a small amount of white to give it some body.  If you need to 'tame' the brightness out of it and bring it down to yellow just thin some yellow down and go back over the brighter yellow.


Next we will add a little white into our yellow to make a bright yellow layer.


And as our final layer take that bright yellow and mix it into some watered down white for a off white yellow color.  This will be your brightest point in the lava though if you feel like you need to go brighter just keep diluting the yellow into white until you reach your desired final layer.


As a final touch I like to edge the base with black though you can always just wrap the lave paterns around the side of the base as you go instead.  Again this is all personal choice.


Finally here's the full on finished regiment of Abyssal Half-breeds all with friendly bright lava bases! It is a lot of steps but they are all fairly small steps that work well when doing larger batches of bases.  Combined with the unit tray this unit really comes to life.

Hope someone finds this little tutorial useful and if anyone wants a tutorial for anything else that's been up on the blog let me know I'll look into to getting a step by step made!

Saturday, July 1, 2017

Bolstering the Ranks

So now that there's a new edition of 40k out I like Kings of War even more.  Seriously though what does GW have against grey knights?  I just want to play with my man dolls without asking my opponent if I can take twice as many points to even the odds!

Ahem...

So my Night Stalkers needed a few reinforcements:


I've been wanting to try out some shadow hounds as they seem like a nice fast cavalry and chaff unit that my army desperately needs.  These little guys come out of the new WizKids unpainted D&D minis.  The quality on those is really high though I do wish they hadn't primed them.  Let the customer choose their own priming color you fools!


A few specters have also been added to bolster the ranged portion of the army as well.  These guys are all mind flayers from the wiz kids line and reaper minis.


Finally I needed to add some Gore Riders to my abyssal dwarves as I just picked up a troop for the campaign.  Yet again I really don't see why people keep hating on mantics minis they have some fabulous sculpts and they paint up really well.  I only wish they had less armor to represent their slave status!


Since I was already painting up a troop might as well finish it up with a full regiment as well.  Another fun thing about the slave orc gore rider regiment box is that you can make both a troop and regiment from one box!  Sweet deal.  Love the little dwarf chariot too.